After creating your Monitoring you may want to see statistics about all the Tweets which are returned or you may want to filter your results. The Monitoring dashboard allows you to apply a series of filters, which you can save as a customised view, to create a dynamic dashboard. Your dashboard shows any changes or filters you apply in real-time, making the dynamic Monitoring dashboard a very powerful tool.
View the Monitoring dashboard
Select Monitoring from the top menu bar.
You will see the Monitoring home screen.
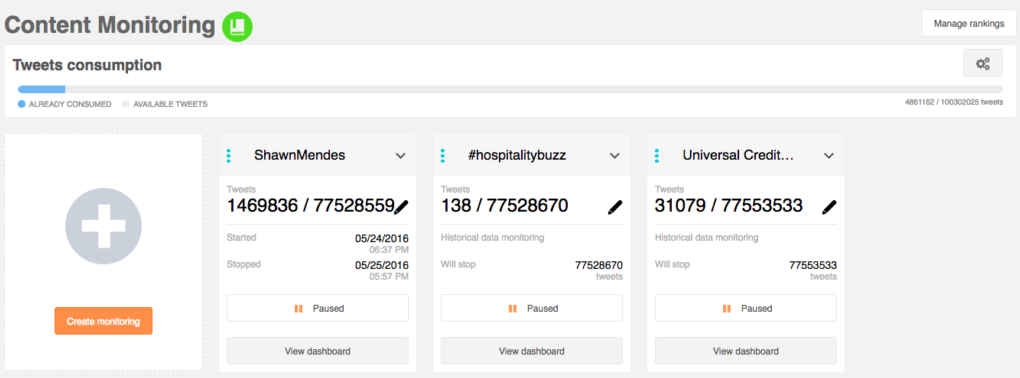
Click View dashboard in the panel of the Monitoring you are interested in to access its dynamic Monitoring dashboard.

The Monitoring dashboard has various areas where you can:
- Select the period
- Manage your Rankings
- Add to an audience
- Export to PDF
- Select a customised view
- View tabs of dynamic panels and widgets (See View a Monitoring Dashboard)
Create a customised view
Apply a series of filters which you can save as a customised view and apply to your Monitorings in the future.
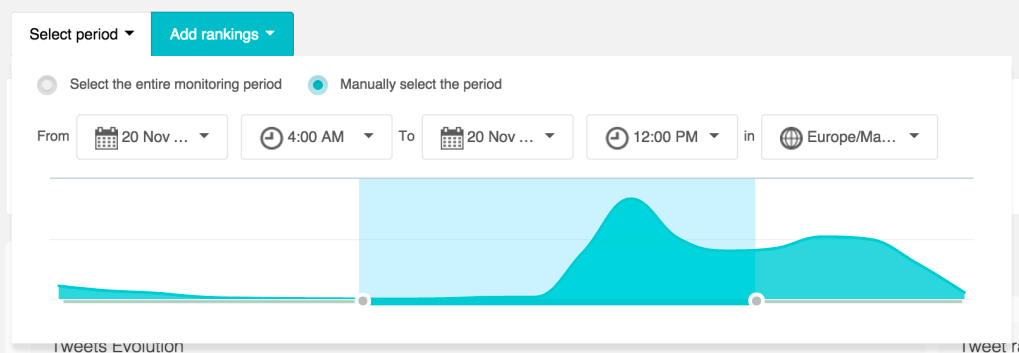
- – Select period
The time period you want the dashboard to reflect is accessed from the select period drop-down menu. Two possibilities exist:
a) You can select the entire Monitoring period, in which case the start and end dates and times of your Monitoring will be used. If you save the customisation and apply it to another data set in the future, the entire Monitoring period is taken as the default value – not the specific dates which were saved in the customised view.
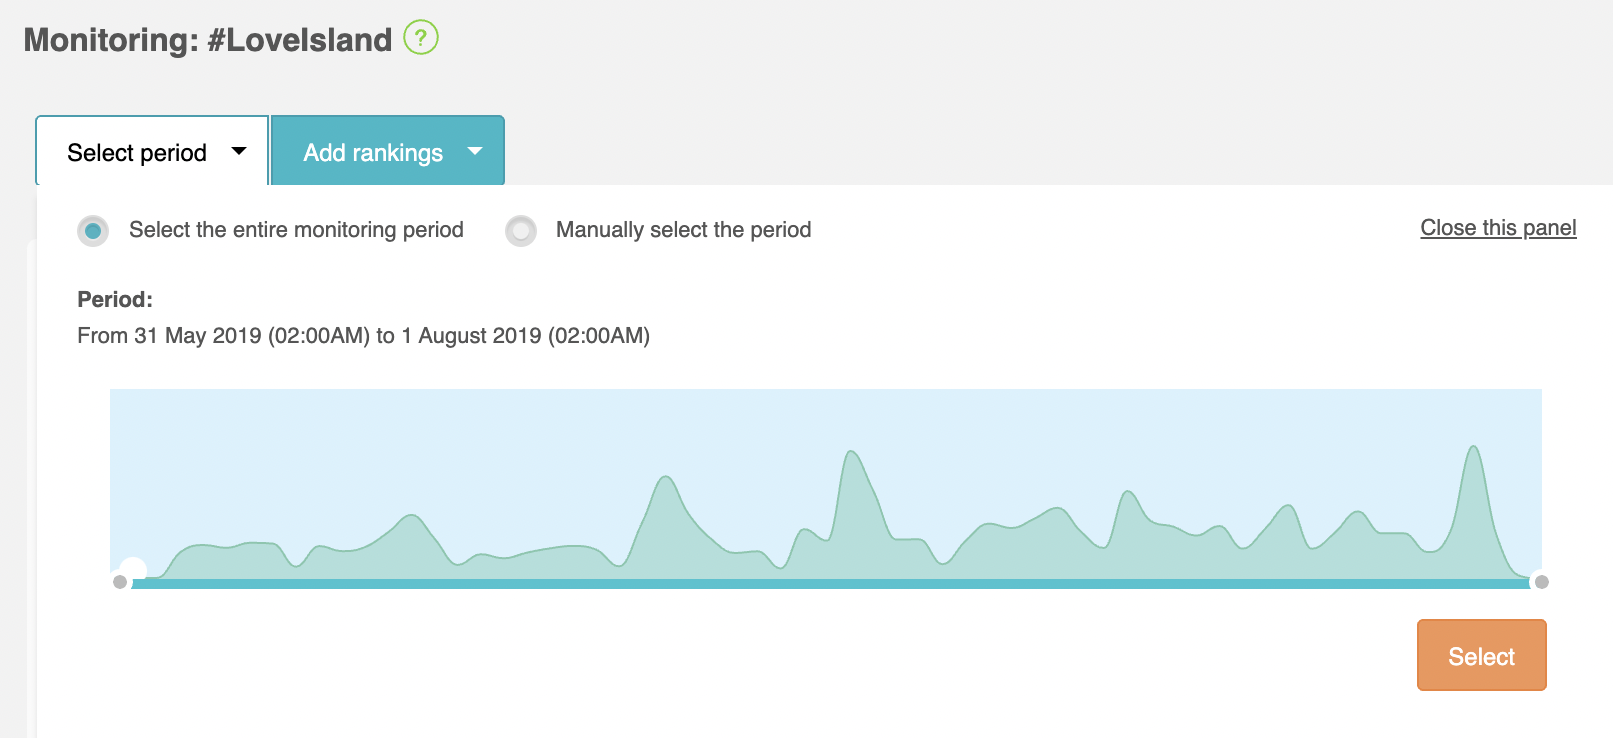
b) You can manually select the period and choose the start and end dates/times yourself. Do this by using the appropriate date, time, and time zone drop-down menus, or use the handles on the slider. For example, for a one week Monitoring you can see the results over each 24 hour period by selecting 7 periods and saving each as a customised view.
- – Add filters based on panels/widgets
Filters can also be added by clicking your chosen area of the panels on each tab of the dashboard. For example, in the sentiment panel in the summary tab, click 'negative' and it will apply and show the view of the analytics with that as a filter. Each filter appears as an individual label in the customisations applied panel, which automatically appears when you add a filter.
The results of the Monitoring reflect all the filters you have applied, and change in real-time as you update and modify the filters.
For example, you may only want to view male users who expressed a negative sentiment who Tweeted from an Apple iPhone. Click on the three relevant panels to define these criteria.
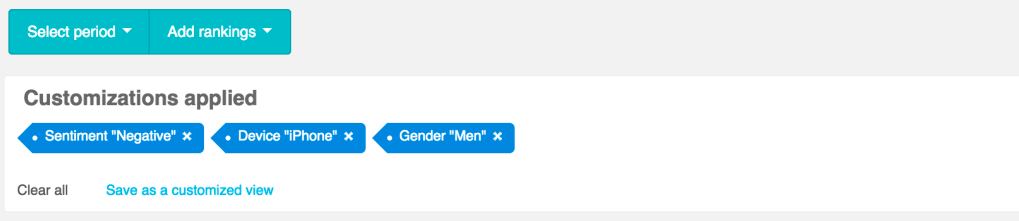
You can perfect your customisations applied by deleting individually, click the x to the right of each filter criteria, or click clear all to to begin again with new filters.
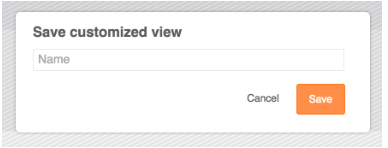
- – Save as a customised view
When you are happy with the filters you have applied, click save as a customised view. Give the view a name and click save, or cancel to return to continue tweaking filters until you’re happy.
- – Apply a customised view
A saved customised view can be accessed in the future by selecting it from the drop-down menu in the top right of the screen.

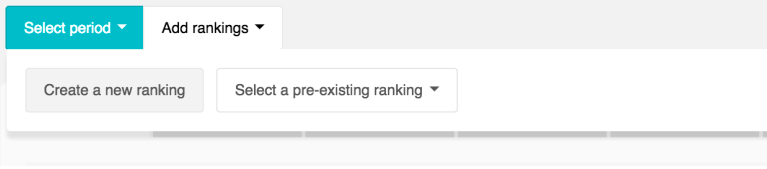
- Add Rankings
The second drop-down menu is add Rankings. Here you can select a pre-existing ranking from the drop-down list to add to your Monitoring or create a new Ranking. Any ranking you add appears in the summary tab of the dashboard and can be removed, in the same way as any other individual filter, in the customisations applied panel.
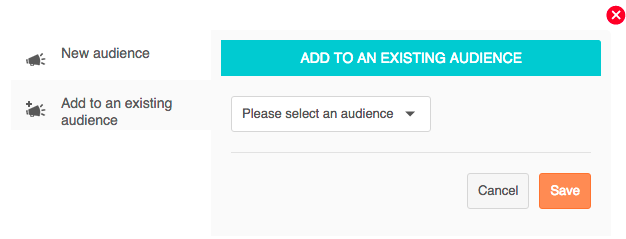
- Add to an audience
A very powerful feature is to be able to add the authors of the Tweets of the Monitoring, or any customised view you have applied, to an existing or new audience by clicking add to an audience. You can then use this audience in a Twitter Ads or DM campaign or browse the users on the community wall to further refine your audience.