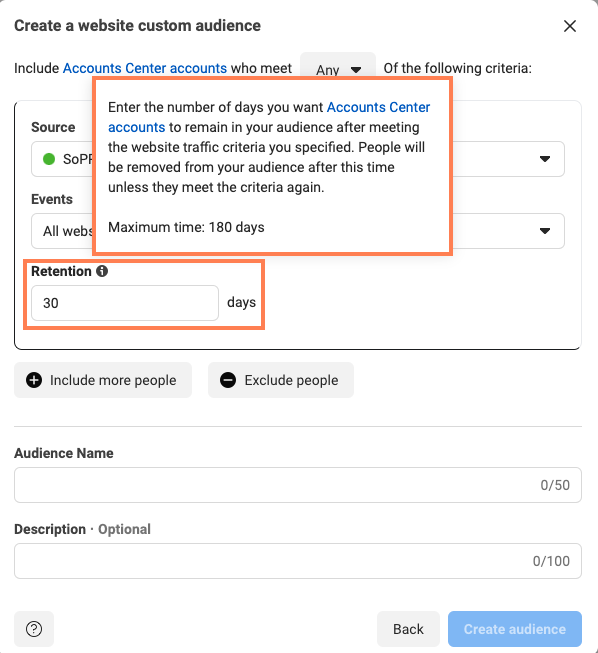
Set up and profile a Custom Audience in Meta Business Manager to target website visitors via Meta Pixel, enhancing ad relevance and engagement.
Creating a Custom Audience based on website visitors using the Meta Pixel allows you to target individuals who have interacted with your site. Here's a concise guide to setting this up:
Prerequisites:
-
Meta Pixel Implementation: Ensure the Meta Pixel is installed on your website or specific pages of interest, such as purchase confirmation or newsletter subscription pages. To verify its presence, use the Meta Pixel Helper extension for Google Chrome.
-
Sufficient Website Traffic: A higher volume of website traffic will result in a more robust and effective Custom Audience.
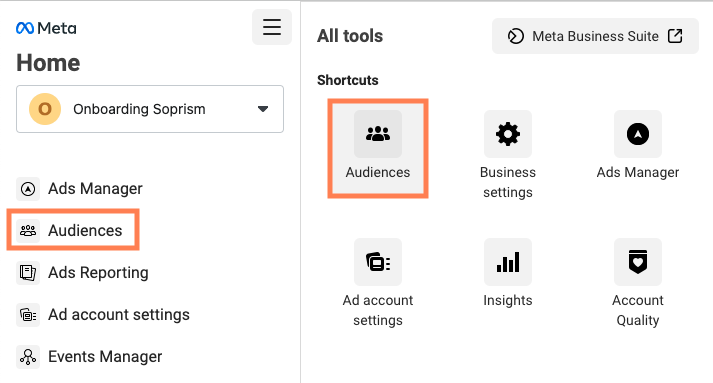
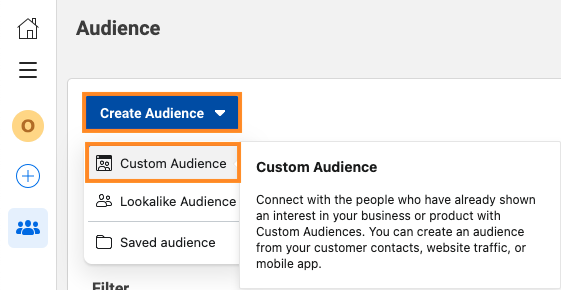
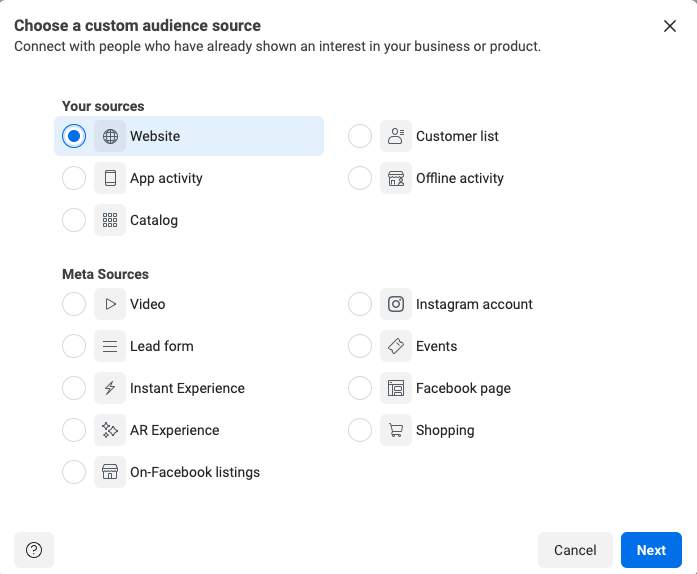
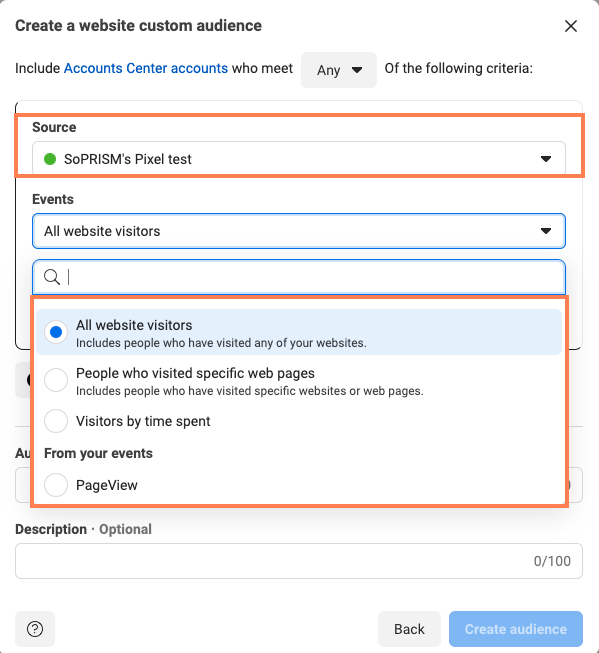
Steps to Create a Custom Audience
Congratulation 🥳 Your Custom audience is created!
After creating your Custom Audience, consider:
-
Creating a Lookalike Audience: Generate a Lookalike Audience based on your new Custom Audience to reach people similar to your website visitors. In order to profile this audience in the platform, we strongly recommend that you create a Lookalike audience based on the Custom you just created. For a closely matched audience, set the similarity to 1%.
-
Launching Targeted Ads: Use your Custom Audience to run targeted ad campaigns, enhancing engagement and conversion rates.
📚 Learn more from the Meta knowledge base:
