Creating a business account in the Meta world can sometimes seem an insurmountable task. Let's take a look at the different steps together!
📚 Ressources from Meta:
👉 Step by step
Step 1: Sign in to Your Facebook Account
Step 2: Access Business Manager
Step 3: Create a Business Manager Account
Step 4: Add Your Business Page
Step 5: Add Ad Accounts and Other Assets
Step 6: Add people to your Business Manager
Step 7: Assign Roles and Permissions
Step 1: Sign in to Your Facebook Account
Before you can create a Meta Business Manager, you'll need a personal Facebook account. If you don't have one, you can sign up for free. Once you have an account, log in to it.
Step 2: Access Business Manager
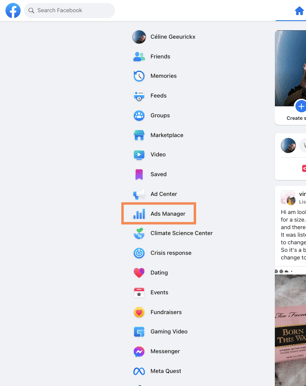
Once you're logged in, go to Business Manager by visiting business.facebook.com or by clicking on the "Business Manager" option in the dropdown menu in the top right corner of your Facebook homepage.

Step 3: Create a Business Manager Account
🎥 Feeling more like "Loom and Chill"? Here is a short video explaining the steps.
If you haven't set up a Business Manager account before, you'll need to create one. Follow these steps:
Step 4: Add Your Business Page
After creating your Business Manager account, you'll need to associate it with your business's Facebook Page. To do this:
Step 5: Add Ad Accounts and Other Assets
Depending on your business needs, you can also add other assets to your Business Manager, such as Ad Accounts, Instagram Accounts, and Apps. (not that if you want to analyse first-party data on SOPRISM, you must add an Ad Account and an instagram account).
To do this:
Step 6: Add people to your Business Manager
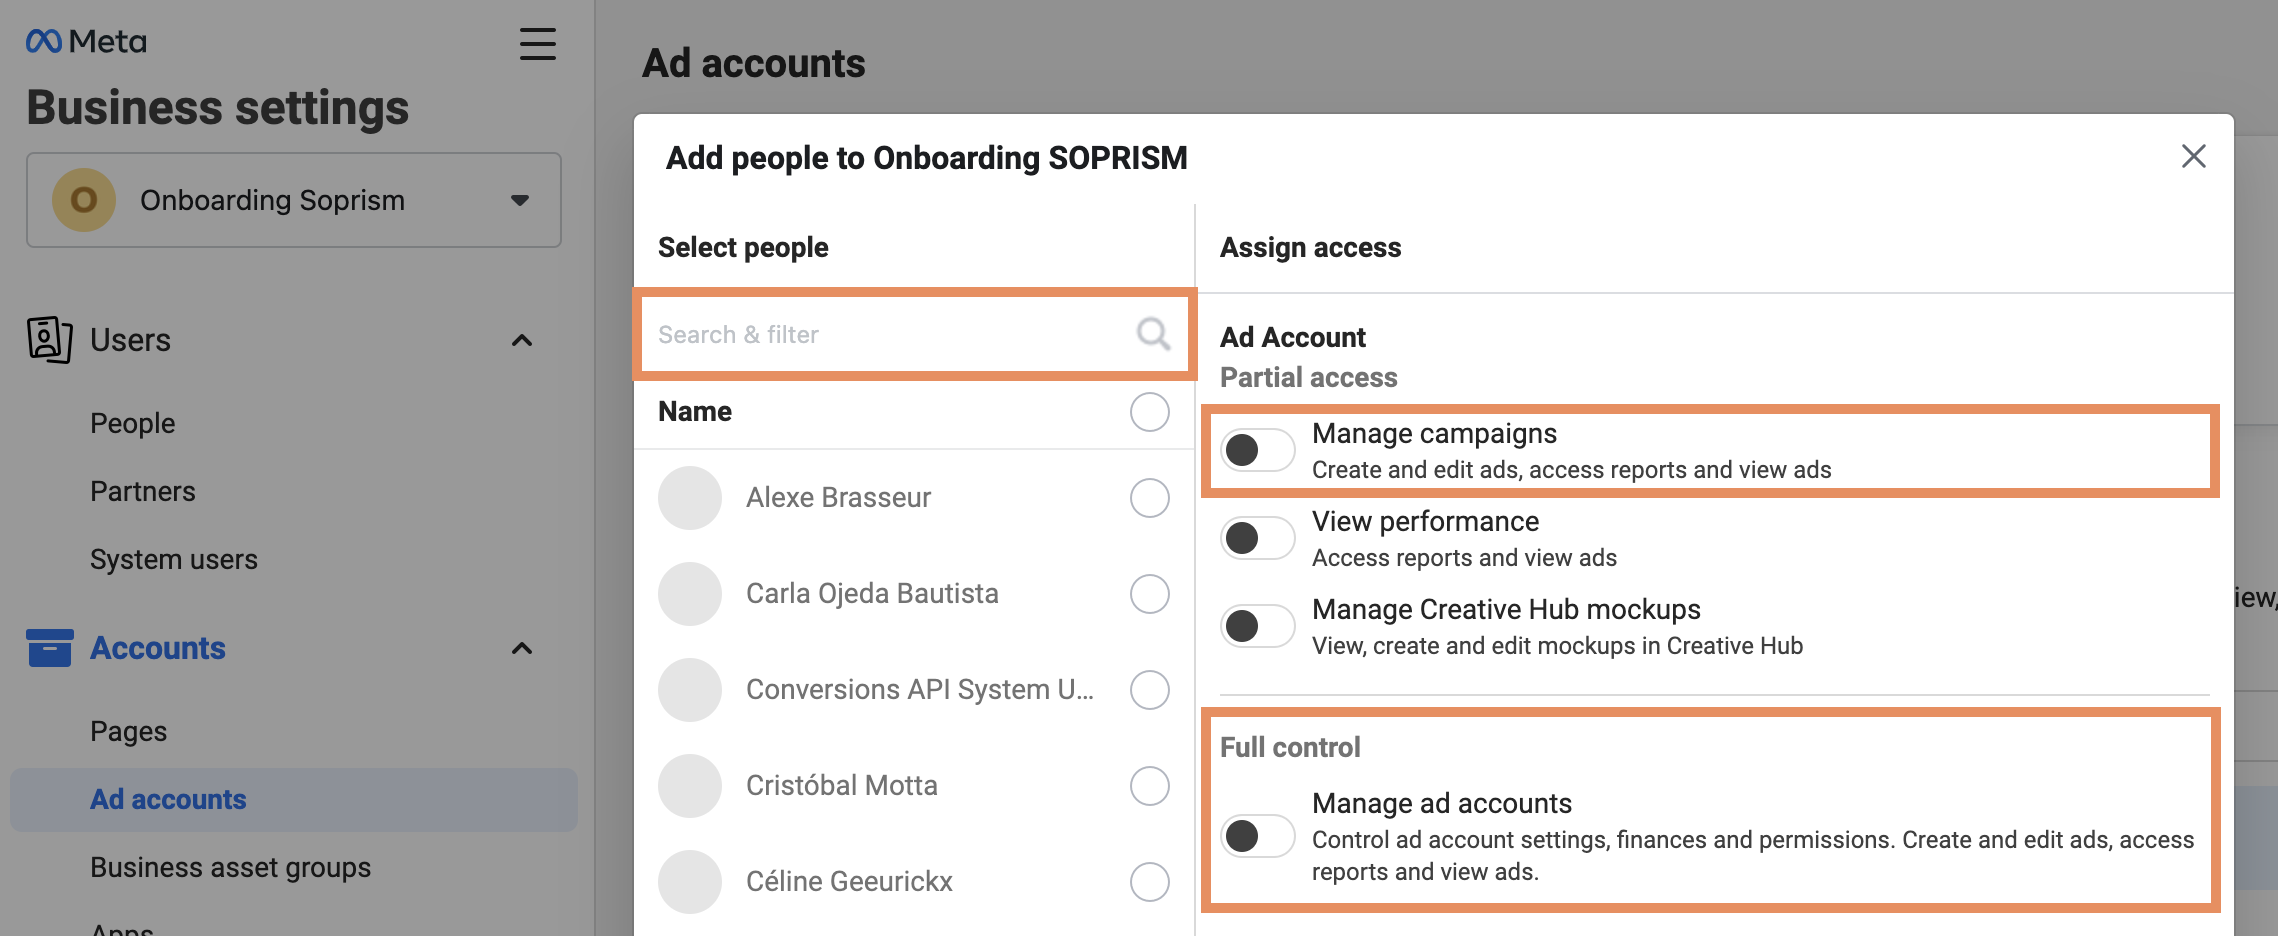
Business Manager allows you to assign roles and permissions to people working on your business's assets.
To do this:
Step 7: Assign Roles and Permissions
For each of your assets, you can add people and permission without giving the full access to everyone.


