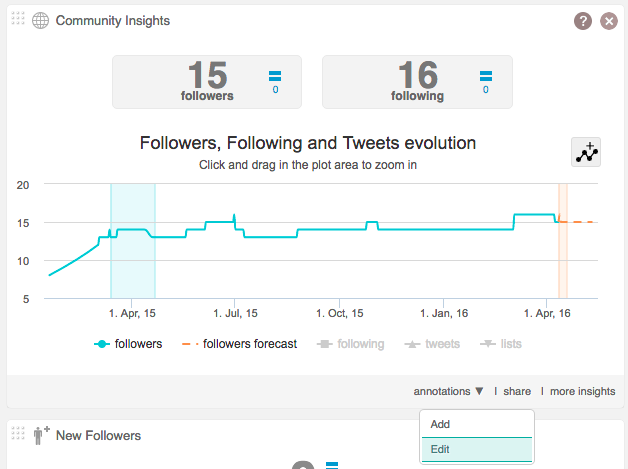
Annotations enable you to highlight specific time periods on the community insights dashboard panel. The period could be that of a campaign you’re running or an event you’re hosting. You can see how these activities have affected your community over the period or compare the effect of two different activities.
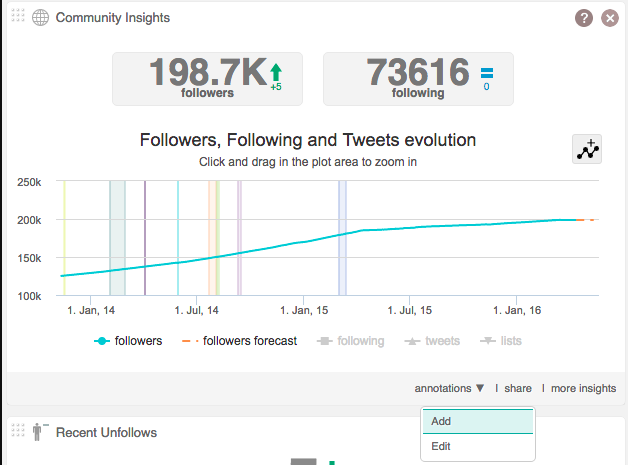
Add an annotation
1. Open the annotations drop-down menu at the bottom of the community insights panel and click add.
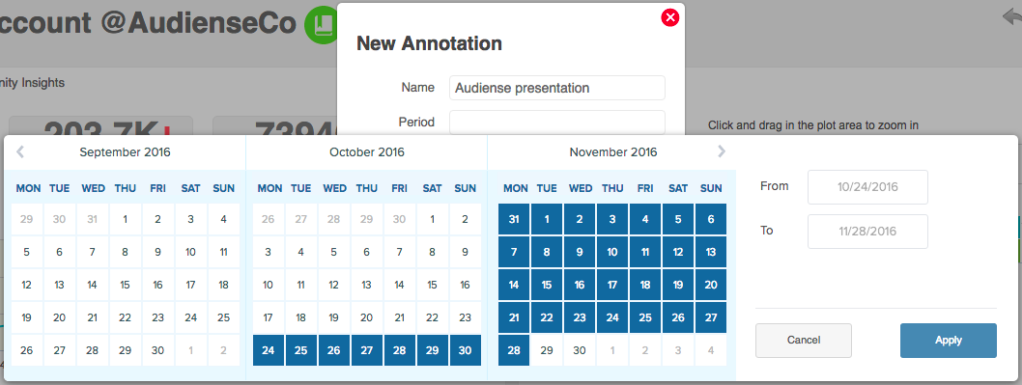
2. Enter a name, select the period using the calendar and click apply.
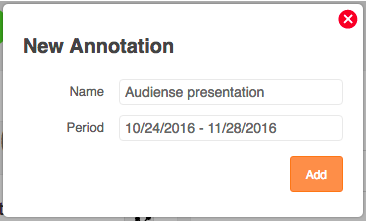
3. Click add and your event timespan will appear on your community insights panel.
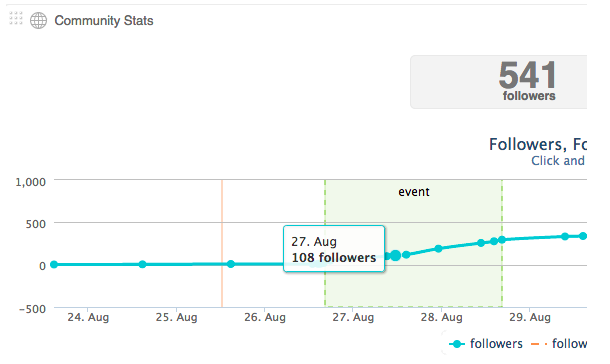
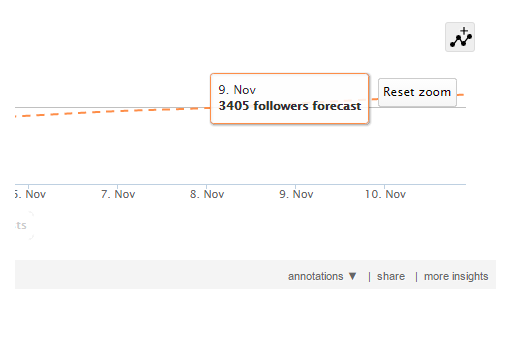
4. Mouseover the highlighted period to see the name of the annotation. Use the emerging date window to see the number of followers you have at different points of time during the period.
5. Drag and drop a box over the coloured area to zoom in on the period. Click reset zoom to return to the default view.
Remove an annotation
1. Open the annotations drop-down menu at the bottom of the community insights panel and click edit.
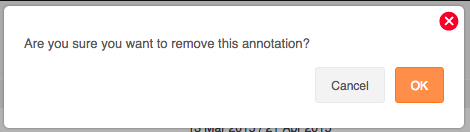
2. Click the remove bin icon of the annotation you want to remove.

3. Click OK to confirm the removal of the annotation.
You can also click new annotation in the top right to add an annotation from this edit page.