Control who you interact with and what you see in your timeline using the mute function.
Note: Users with a Free plan do not have access to this function. Users with a Twitter Marketing plan or an Audience Insights plan will have access.
There are two ways to control how you interact:
- Unfollow – The easiest and most dramatic action you can take.
- Mute – The least ‘brutal’ of the three actions. Muted users are not notified about the mute and have no way to see they are muted. You don’t see a muted user’s Tweets in your timeline but you still receive notifications if they mention or DM you. A muted user can still like, reply to and Retweet your Tweets. Mute accounts whose Tweets you don’t want to see, maybe friends who Tweet too frequently but it would be impolite to unfollow them.
Please note: you used to be able to block, however this has now been deprecated due to new X rules and adjustments on our side.
Mute one individual user
There are two options:
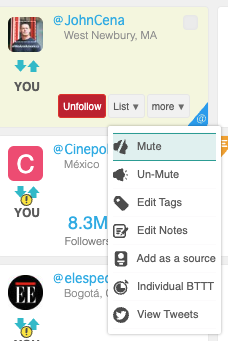
- Mouseover each individual user card on the community wall and click the more drop-down menu and select mute or unmute.

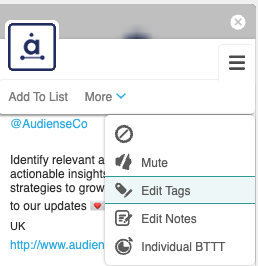
- Click the username of each individual user card on the community wall to open the actions menu on the emerging user details sidebar and select block or mute. It’s not possible to unblock or unmute from the sidebar.

Mute multiple users
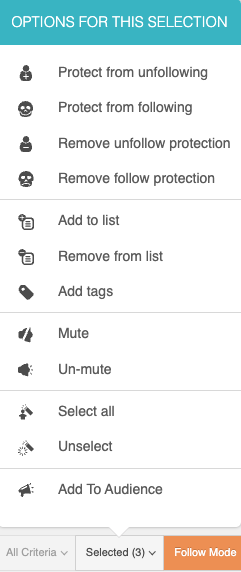
Use the selected drop-up menu on the community bottom bar.

1. First select the desired users on the community wall, either:
- Use the checkbox in the top right corner to select individually.
- Click and drag a box over multiple users.
- Use the select all button on the selected drop-up menu.
You’ll see the number of users you have selected in the parenthesis on the selected button, e.g. “selected (7)”:

Remember that you can only select users on a page-by-page basis, i.e. if you change page the number of selected returns to its default value (0). However, you can change the number of user cards per page in settings.
2. Click the option you want to carry out from the selected drop-up menu, either:
- Mute
- Unmute.
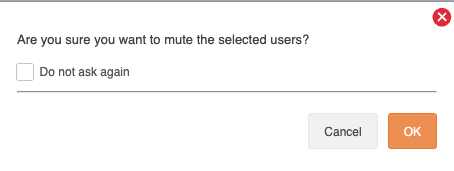
3. You will be asked for confirmation. If you don’t want the confirmation panel to repeat then check the box marked do not ask again. When you are ready click OK.
