A filter is a set of restrictions applied to a community which you can save for future use and also use as the basis for a custom widget which you can use to monitor users who comply with the saved filter.
Save a filter
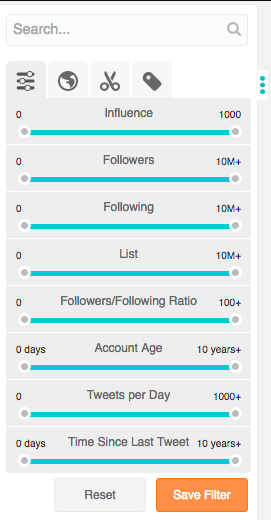
1. Use the influence and activity filters and demographic filters of the search/filter sidebar to add restrictions or criteria to create the ideal custom filter for your needs. As you refine the filter the criteria you add appear in the breadcrumb bar.
2. To save the filter either:
- Click save filter in bottom right of the search/filter sidebar.
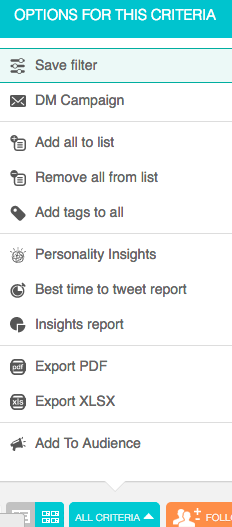
- or click save filter on the all criteria drop-up menu.
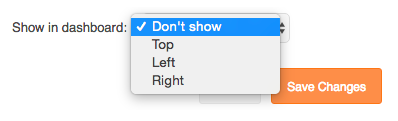
3. In the emerging save filter panel give your filter a title and a description. Select valid for any account or source if you want the filter to be available for all accounts/sources. Use the show in dashboard drop-down menu to select the position on the dashboard for a custom widget based on your filter criteria (see create a custom widget below).
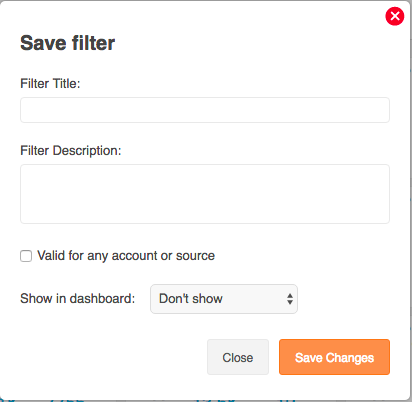
4. Click Save changes to save the filter.
Apply a saved filter
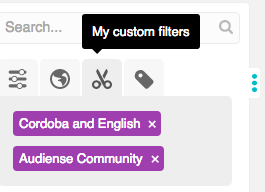
The filter will be saved in the my custom filters tab of the search/filter sidebar.
When viewing the community wall of any account or source (audience uploaded to connect, created in the audience manager in connect, or sent to connect from Insights) you can select the filter to apply the same restrictions to that community. The restrictions that were saved with the filter are visible in the filter bar, for example:

You can modify the restrictions by returning to the influence and activity filters and demographic filters of the search/filter sidebar and use the sliders to change the range you have saved. The changes take effect in real time.
Delete a filter
Click the x next to the filter name to delete that filter. Although you delete a filter, if you created a custom widget with the filter (see below) then the custom widget is not removed from the dashboard. To remove the widget do it directly by clicking the (x) icon of the widget.
Create a custom widget
A nice way to easily monitor specific members of a community who comply with your filter is to create your own custom widget which is then added to the dashboard.
To do this, before you click save changes, use the show in dashboard drop-down menu of the save filter panel to select the position for your widget.
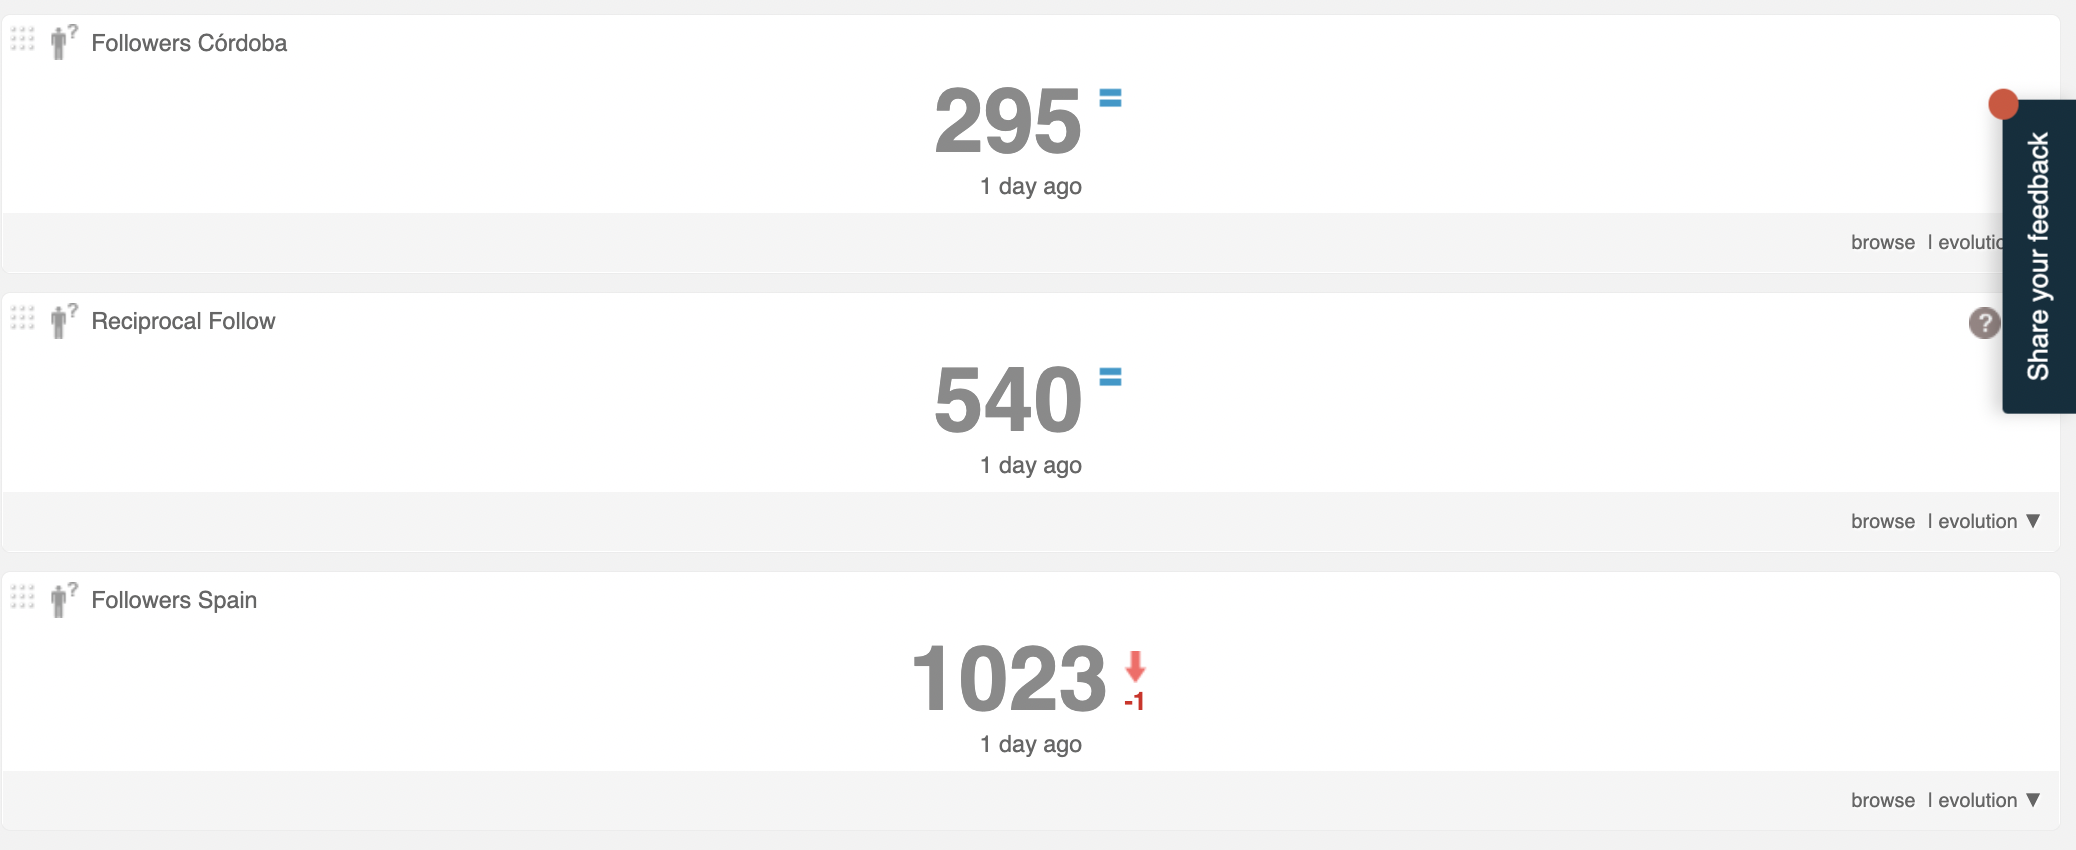
A custom widget has the same format as the community widgets of the owned account dashboard, for example, a custom widget for the users who specified “Cordoba” as their location:

When you view the dashboard your widget will be visible and whenever the account is synced you’ll see the change in the users who comply with the criteria you specified in the filter. You can then perform the usual community management actions to those users that interest you.
Custom widget actions:
Click the nine dot grid in the top left corner to drag and drop the widget and rearrange widget positions.
Mouseover the ? icon to see the filter description you specified when you created the filter.
Mouseover the widget and click the x icon to remove it from the dashboard.
The small green or red number is the change compared with the previous synchronisation. Green for an increase, red for a decrease and a blue = sign for no change.
Click share to open the Tweet Editor. You will see a default Tweet, with a summary of the widget data, which you can edit and send as a Tweet or DM.
Click browse or the central number to see these specific users on the community wall where you can search and filterusers and perform typical community management actions.
Click evolution to expand the widget and see the change over time.
Another example might be to create a custom widget for a competitor’s account.
1. Add the competitor’s account as a source if it is not already a source (third party account synced in your dashboard).
2. When the source has finished synchronising click the top half of the source panel on the homepage to go to the dashboard, or click the bottom half to go directly to the community wall.
3. Choose a widget, e.g. followers, recently followed, new followers, to base your custom widget on. For example, let’s click new followers widget title to go to the community wall.
4. Again use the search/filter sidebar to refine the set of users you want to monitor with your widget, for example, users with influence higher than 500, and then save the filter as before.
5. When you return to your competitor’s dashboard your widget will be displayed.
Whenever their account is synced, you’ll see the new followers who fit the criteria you specified. Click browse or the central number to see these new influential followers on the community wall and where you can perform the usual community management actions.