
To analyse and understand online communities, define the audience you would like to run your report on.
Note: this video is intended for users on the Audience Insights plan. If you are on a Free plan, or a Twitter Marketing plan, please watch the relevant video for you here.
This audience can be as general or niche as you like, from the UK female population to the millennials who like Stranger Things in London, or CMOs in Madrid.
Let’s get started by clicking on create new report in the top right hand corner.
You will be asked what audience type you want to base your report on.
For free users, you will only be able to choose Profile Attributes.
For paid users, you have access to Profile Attributes, Conversations, and Uploaded lists.
You can title your report at any point in this process, but now is a good time! Choose a title that is relevant or memorable to the audience you are researching.
If you have chosen Profile Attributes:
For free users, you will only have the option to create your audience through using the Basic Audience Insights Manager.
For paid users, you will then have the option to create your audience through the Basic Audience Insights Manager or Advanced Audience Insights Manager . We recommend you use the Advanced Audience Insights Manager.
If you are automatically taken to the Basic AIM, please select 'Switch to the Advanced Audience Manager' at the bottom of the Basic Audience Insights Manager page.

At this point, you will have to define your target audience using the different filters available in Audiense.
For free users, you can choose a combination of the 4 filters, but they will all be added with 'OR' logic, AND a country filter, or the default is global.
For paid users, select a filter click plus button  and create the perfect audience for you with a 9 filters using 'AND' 'OR' Boolean logic. The filters include:
- Age
- Biography
- Entity Type
- Followers
- Gender
- Job Title
- Language
- Location
Want to understand these filters in more details… read more here
Example: If you wanted to find USA or UK male millennial who like the vikings football team, you would use the following:
- Location = Any of: United States of America, UK
- Gender = Male
- Age = select: 13-17, 18-24, 25-34
- Followers = @Vikings

Remember, you are able to use the OR or AND to apply additional features. For example:
- Finding people based in the USA OR The United Kingdom
- Finding people based in USA AND The United Kingdom
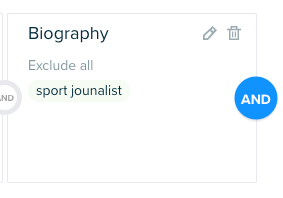
In the same way, you can exclude people that meet a certain criteria. For instance, people who describe themselves as sport journalists.
Click 'Apply' every time you add a new filter.
When you have finished adding criteria to identify your audience, then select Next in the top right hand corner. You will then be asked to choose a segmentation method: Interconnectivity or Affinity.
Free users will only have access to Interconnectivity.
To find out more about our segmentation methods, read here.
Click Next. Verify your audience criteria as correct, and then Launch your report now!
Please bear in mind that the minimum audience size to create an Insights report is 100 members. If your audience is too small, check if the criteria you have selected is too narrow, or mismatched, and try to remove/edit some of the criteria.
Clone your report definition
If you’re creating a new report based on a previous audience definition, you will find it easier using our ‘clone your report’ feature. Additionally, if you want to create a report with the same definition as a previous report, as well as some newly added criteria, this feature will help you.
In the report list, in the actions menu, you will find an option for clone audience definition. This will open a new report creation menu with the definition added, from there you can edit it by removing or adding criteria. Once you are ready, launch your report!
If one of your reports failed to generate, you can easily use the ‘clone your report’ feature to start again and add/remove criteria so that it has another chance to generate.